Monday, March 24, 2014

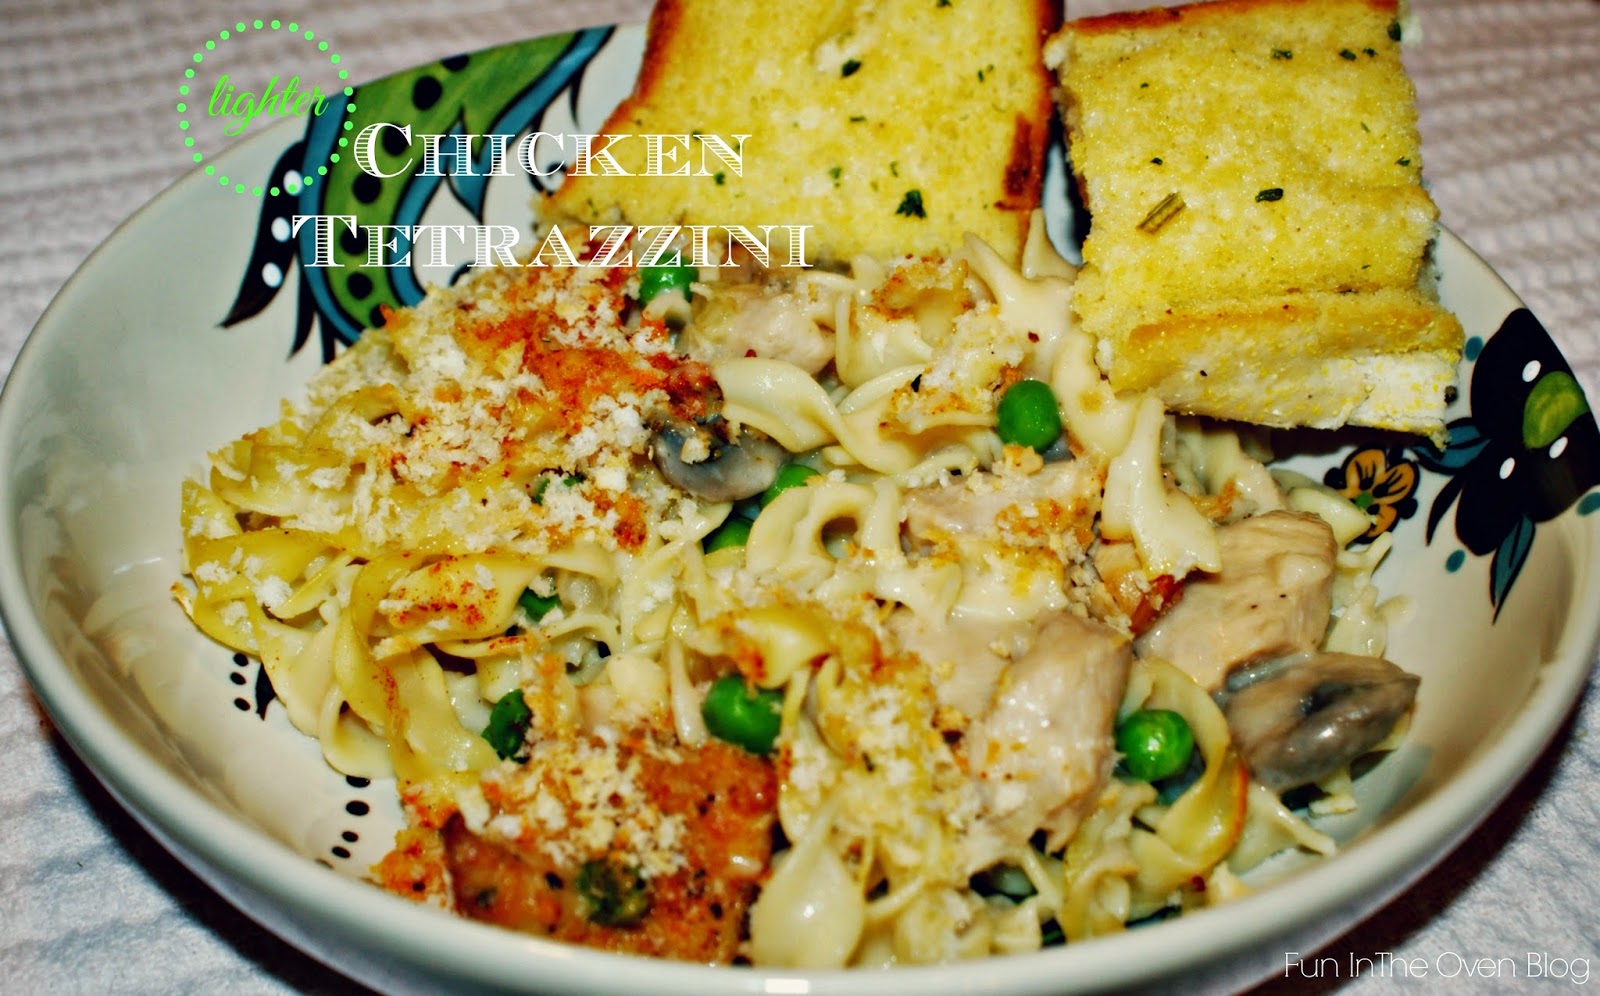
{lighter} Chicken Tetrazzini


Chicken Tetrazzini is one of those great dishes that are so versatile yet so satisfying.
If you're serving up Chicken Tetrazzini you  really can't go wrong. 

I came across this lightened-up version of the recipe in my Comfort Foods Makeovers cookbook by America's Test Kitchen. 
(This is one cookbook I really cherish and  love oh so much!! I know you will too and can purchase the cookbook here).

One thing that I really love about this dish is that you can make this casserole ahead of time,  store it in the fridge until you're ready to eat, and then just simply pop in the oven - making it a quick, no-fuss week night meal. 

This dish is also packed with satisfying and healthy ingredients, like lean chicken breast, mushrooms, and peas.

This particular (lightened-up) version calls for a cup of frozen peas, and I must admit  I was very a little skeptical at first.
However, and much to my surprise, the peas give this dish such a great texture with the added benefit of vegetables. 
Needless to say, I am a skeptic no longer! 
And, let's also just say, I'll never make Chicken Tetrazzini with out them!

With the addition of the frozen peas, it also made me ponder what other veggies I could add.
Carrots?  Celery? Finely chopped Bell-Peppers? Maybe even some broccoli?!!
Yes, I'll definitely be giving the broccoli idea a try one of these days.

Anyway, broccoli, peas, and peppers aside, this dish is definitely a keeper!
{lighter} Chicken Tetrazzini is a husband-friendly (and I assume kid-friendly) dish that the whole family will be sure to love. 

If you've never had Chicken Tetrazzini before, you must give it a try! 
I promise you won't be dissatisfied.

{lighter} Chicken Tetrazzini

(the order of events)


Begin by trimming the fat from your chicken and cut your chicken breasts into 1/4 inch pieces. 
Add your chicken pieces to a bowl.


Marinate chicken with soy sauce, garlic salt and pepper. Cover with plastic wrap, and refrigerate for 30 minutes to 1 hour.
(BTW, I found out this process makes your chicken super flavorful and extra tender)

Meanwhile, begin cooking your egg noodles. Cook until al dente.

Melt one tablespoon of butter in a 12-inch skillet over med-high heat. 
Add your mushrooms and onions, as well as some garlic salt and pepper (to taste).
Cook until golden brown. 
Next, add your flour and continue to cook for about 2 minutes, or until golden. 
Next, whisk in the broth and sherry and bring to a simmer. 
Add cream cheese and 6 tablespoons Parmesan cheese. 
Simmer until slightly thickened. 
Next, grab your marinated chicken and a cup of frozen peas and add them to your skillet.
Simmer for a couple of minutes. (note: the chicken is not fully cooked)
Next, add the al dente noodles to a large bowl and pour in the chicken & peas mixture. 
Toss together, or stir to combine.


Once everything is nice and combined add it to a square baking dish. 
Top with breadcrumbs, remaining parm. cheese, salt and pepper to taste. 
(I also like to add a few dashes of paprika for extra flavor. 
Pop it in the oven at 400 degrees, for about 12 to 14 minutes, or until hot all the way through.
Let cool for a few minutes before serving. 


You can also use cooked turkey, making this a must have for Thanksgiving left overs. 


{lighter} Chicken Tetrazzini

Ingredients:


  • 12 ounces boneless, skinless chicken breast (cut into 1/4- inch pieces)
  • 2 tablespoons soy sauce (use low-sodium for a lighter option)
  • ounce bag medium egg noodles
  • 1 tablespoon butter
  • 8 ounces sliced mushrooms
  • 1 white onion, chopped fine
  • 2 tablespoons all-purpose flour
  • 1 cup low-sodium chicken broth
  • 2 tablespoons sherry
  • 3 ounces neufchatel cream-cheese, softened
  • 1/2 cup grated Parmesan cheese
  • 1 cup frozen peas
  • 1/2 cup panko bread crumbs
  • garlic salt & pepper (to taste)
  • a few dashes of paprika (optional)


  • Directions:


    • Heat oven to 400 degrees
    • Combine chicken pieces soy sauce, garlic salt and pepper in a bowl - Cover and refrigerate for 30 minutes to 1 hour.
    • Cook egg noodles, just al dente, according to package directions (reserve 1 cup of cooking water)
    • While pasta is cooking, melt butter in a 12-inch skillet over medium-high heat
    • Add mushrooms, onions, 1/2 tsp. garlic salt, 1/2 tsp. pepper and cook until browned (about 6-8 minutes)
    • Stir in flour and cook an additional 2 minutes, or until golden brown
    • Next, whisk in broth, sherry, and reserved cooking water, scrapping up any brown bits, and bring to a simmer.
    • Whisk in cream cheese and 6 tablespoons Parmesan cheese and simmer about 1 minute, until slightly thickened
    • Stir in marinated chicken and peas, simmer gently for about 1 minute (note: chicken will not be fully cooked)
    • Add chicken mixture to cooked pasta in a large bowl, and toss to combine
    • Transfer chicken and pasta mixture to square baking dish
    • Top with panko and remaining Parmesan cheese, salt, pepper, and a few dashes of paprika (optional) to taste
    • Bake about 12 - 14 minutes until hot throughout
    • Let cool slightly before serving
    • Enjoy!


    Tuesday, February 11, 2014

    Sweet 'n' Salty Raspberry Kisses {Valentine's Day Treats}


    Have you heard?

    Valentine's Day is right around the corner....

    That's right, Friday is the big V-day.

    So let's make something you can share with your loved ones, co-workers, friends, and, of course, your lover.

    These fun and delicious little Raspberry Kisses are the perfect treat.
    Spread some love, treat yourself, and enjoy all that is Valentine's Day. 

    These are SO great! A little sweet. A little salty. AND only 3 Ingredients (+ sprinkles)

    Here's what you'll need
    For these Sweet 'n' Salty Raspberry Kisses you'll need:
    • A bag of pretzels (I like the square ones)
    • A small bag of White Chocolate kisses
    • A small bag of Raspberry MnM's
    • + fun sprinkles of your choice (optional)

    Here's what you do

    Kisses topped Pretzels

    Lay a few pretzels on a microwave safe dish.
    Place one kiss on top of each pretzel (pictured above).

    Melted Kisses

    Place the dish in the microwave and begin microwaving the kisses and pretzels in 20 to 30 second intervals.

    Once they are beginning to melt remove from microwave (they will look like the picture above).

    BE CAREFUL!!!! when removing from microwave -The plate may be HOT!

    Next, top each Kiss/Pretzel with one M'n'M and smush it down while the chocolate is still warm.

    Top with sprinkles.

    Let them cool as you make your next batch. 

    Cooling Treats

    After the treats have cooled, pack them up in a fun tin or box and let them cool over night in the fridge. 

    Pass them out and make someone's day!!

    Easy, fun, and just lovely.

    Wishing you all a wonderful Valentine's Day, and sending each of you lots-of-love!

    I hope you have as much fun making these as I did.

    Enjoy,
    Amanda 


    Thursday, February 6, 2014

    Bacon & Blue Hamburger Steaks with Mushrooms


    I don't know what it is about a Hamburger Steak, but man 'o' man, are they DELICIOUS!!

    Never heard of such a thing? 

    Let me fill ya in...
    ahhhh the Hamburger Steak. Simply put, the hamburger steak is a patty that is supposed to be representative of a "steak" in shape, but is made out of ground beef just like a burger, yet it isn't sandwiched in between two buns with all the fixin's. Instead, a Hamburger Steak can be topped with anything your creativity and imagination can think of. 
    Not to be confused with a Salisbury steak, which is made with minced beef, the hamburger steak is something to behold, and easily made out of your regular ole ground beef. 
    Nothing too fancy, right? 

    Unless you top it with Blue Cheese, Mushrooms, and BACON JAM! 

    Yes, you heard it here first!
    BACON JAM!!!

    This stuff is the JAM!! (pun intended)


    Prepared Hamburger Steak Patties

    Topped with Bacon Jam & Blue Cheese

    Bacon and Blue Hamburger Steaks 

    (adapted from HEB)

    Ingredients:

    • 1 lb. extra lean ground beef
    • 1/4 cup chopped green onions
    • 1/2 cup Blue Cheese crumbles
    • 4 heaping tablespoons of Bacon Jam
    • 8 oz. sliced Mushrooms
    • 1 tsp. Garlic Salt
    • Pepper to taste

    Directions:

    • In a large bowl,combine ground beef, green onions, garlic salt, and pepper. Mix well and form beef into 4 equal sized patties.
    • Next, spray a large skillet with non-stick cooking spray over medium heat. Sauté mushrooms until well browned. Remove mushrooms from skillet and set aside in a bowl.
    • In the same skillet, re-spray with non-stick cooking spray then add the four patties. Cook for 6 minutes on one side. Flip the patties and add 1 tbsp. of bacon jam to each patty. Top each patty with Blue Cheese crumbles. Cover and cook until cheese begins to melt.
    • Next, remove the patties from the skillet, add to a plate, and top with the sauteed mushrooms.
    • Serve & Enjoy!

    Thursday, January 9, 2014

    Olive Garden (Inspired) Salad


    If you're anything like me, you believe Olive Garden has some of the most crave worthy Italian food.

    And, if you're anything like me, there isn't an Olive Garden in your neck of the woods (bummer) - yet you still find yourself craving their amazing food. 

    One of those especially crave-worthy, and amazing, foods is their endless dinner SALAD. 

    The crispy iceberg lettuce + the undeniable zing of their dressing +  delicious veggies = PURE AMAZINGNESS!


    Luckily, and thanks to Pinterest, I found an Olive Garden Inspired Dressing recipe that is sure to remind you of the "OG" (a.k.a. Olive Garden). It's just like the real deal, and most likely you already have the ingredients on hand. 

    You can whip up this dressing, store in a mason jar (or tightly sealed container) and have "OG Inspired Dressing" to smother your salads for a couple of weeks. Be sure to store dressing in the fridge, and shake well before re-using. 


    Olive Garden (Inspired) Salad (Adapted from The Country Cook)

    Ingredients

    For the Dressing
    • 1 packet Italian Dressing Mix (and 1/4 cup vinegar, 3 tbs. water, 1/2 cup oil to make dressing)
    • 1/2 teaspoon dried Italian Seasoning
    • 1/2 teaspoon sugar
    • 1/4 teaspoon garlic powder
    • 1/2 teaspoon salt
    • 1/4 teaspoon pepper
    • 1/2 tablespoon (real) mayonnaise
    • 1/4 cup olive oil
    • 1 1/2 tablespoons water
    • 2 tablespoons white vinegar
    For the Salad
    • Iceberg lettuce
    • Olives (black or green)
    • Sliced Red Onion
    • Shredded Parmesan Cheese
    • Sliced Pepperoncini Peppers
    • Salt & Paper to taste

    Directions

    For the Dressing
    • Begin by preparing the Italian Salad Dressing according to the package directions - (add 1/4 cup vinegar and 3 tbsp. water cover and shake vigorously until well blended. Then, add 1/2 cup oil and shake again until completely blended).
    • Next, add prepared Italian dressing in a bowl and begin adding the remaining dressing ingredients.
    • Whisk all ingredients and mix well (I use a sports shake blender) then transfer OG dressing into a sealed container (mason jar).
    • Refrigerate until ready to use. (Will last about 2 weeks in your fridge).
    For the Salad
    • Shred iceberg lettuce (enough to make a side salad portion)
    • Add sliced red onion, olives, and peperonccini's.
    • Top with Parmesan cheese, salt & pepper to taste.
    • Drizzle OG dressing.
    • Mix well.
    • ENJOY!


    This post is linked with love to the fabulous Full Plate Thursday, at Miz Helen's Country Cottage


    Friday, January 3, 2014

    {Five} Faves: FRIDAY

    So I decided to start something new. Heck, it's a new year, why not??
    Each week, I'd like to share with you my top 5 favorite things from the past week.
    Things related to cooking, working in the kitchen, gardening, products and recipes I love, or whatever else seems to pop into my brain at that moment. 


    Image via//Sweetness In Starlight

    Are you ready?? 
    Me too!!

    1.  Food Chopper by Pampered Chef - Holy Smokes, do I ever love this thing or what?! It is by far one of the best inventions, EVER! You can use this handy little device to chop-up veggies & fruits. You can use it to dice up pretty much anything, which is awesome and saves you a lot of time! For example, bawling your eyes out when dicing onions can now become a thing of the past. It also works great for chopping nuts, and other hard foods like candy. Best part: It's 100% dishwasher safe! I love love LOVE it! This bad boy is an absolute kitchen must-have. 

    Image via//Pampered Chef


    2.  ABC's The Taste {Television Show} - Eeeek!!! I'm squealing with excitement! I'm so so so HAPPY ABC's The Taste is back for season 2. The first season was so much fun to watch - we didn't miss a single episode. Last night {Thursday}, the show premiered with contestants trying their best hand {or shall I say, bite} to be chosen as a chef in one of four judges' kitchens. I'm a huge fan of Anthony Bourdain & No Reservations, and think he's all around fantastic! Needless to say, we were immediately drawn to this show. This season looks like so much fun, and I am glad chef Marcus has joined the other judges. I've already got my top picks... I may or may not be rooting for  Food Blogger, Audrey Johns. "High-Five! Whoop! Whoop!" to all the home cooks out there!!
    Image via//ABC


    3. THE Blue Spoon - If you're following me on Instagram, you might have seen this post about the beloved blue spoon. I am not too sure where this spoon came from but I must say, it's a keeper! I use it religiously in the kitchen for anything from mixing, stirring, to scooping. But most importantly, its shinny blue color, speckled with confetti-like dots just makes me smile every time I look at it. And, I know that it helps me cook my dishes too, I just know it does. Maybe my love for the spoon possibly spills over into making the food - therefore, food made with love? Yes, that must be it.


    4. Ole Smoky Apple Pie Moonshine - This stuff is almost too good, and I mean that in the best possible ways. Mix up this Moonshine with some fruit juice, especially some Apple Juice, pour it over some ice, serve it chilled... sip it up.. and WHOOOIE!! Or if you'd prefer, or just plain eagar, you don't even have to mix or serve it. You can just drink it right out of the jar if you please. Husbands especially love it... and wives especially love the nice big mason jar when said husbands finish it off. Winning and Winning.
    BUT please BE CAREFUL {and legal}, it's the strong stuff.


    and last, but definitely not least...

    5. Skinny Cow's Peanut Butter Creme filled Chocolates - Okay, seriously y'all, you gotta hear me out on this... First let me just say, I am NOT one for skinny, lite, fat-free anything. Mainly because, well, it usually taste fat-free, or sugar free, or made with some other sweeter that's not sugar. And I know all that fat and sugar stuff is not so great for ya, but I am telling you, it's great for my taste-buds. Okay, now let's back to the topic at hand here... These, these right here -THESE. ARE. SO. DANG. DELICIOUS!! Image a fancy peanut butter cup (3/pck) and each pack contains only 130 calories and 7 grams of fat! I know what you're thinking... but I'm telling you they DO NOT taste anything like they only contain 7 grams of fat or 130 calories, especially split among the three of them. AND, unlike some other chocolate & peanut butter treats which only contain two per pack, these Skinny Cow Chocolates are nearly half as many calories and grams of fat per serving! Yeah, they are pretty amazing! 
    You can grab a box full of 6 packs (which will allow you to share, in case you're feeling friendly) at your local grocery store. Please do, go pick some up, you and your friends will thank you. Oh, and they also have Caramel (OMG!) filled chocolates too! Hats off to you Skinny Cow!
    Image via//Queen Be Coupons

    Note: I received this product complimentary from Influensterhowever all content and opinions expressed here are 

    my own. 


    So there ya have it, my first ever top 5 favorites post from this week!
    What about you guys?
    Do you have any top faves from your week? 
    I'd love to hear them!


    Follow my blog with Bloglovin

    Wednesday, January 1, 2014

    Happy New Year!! a.k.a Eat Your Black-Eyed Peas


    Hey Everyone & Welcome to 2014! 
    I wish each and every one of you a fabulous new year, and may you make the very best of 2014!

    With the start of the new year comes the Black-Eyed Peas, Greens, and some form of pork for your enjoyment and eating pleasure.

    Maybe it's because I'm Southern,
     or maybe it's because I'm Superstitious, 
    OR
    Maybe it's a combination of both
    but every New Year's Day (NYD) I make it a point to devour a good ole heaping helping of Black-Eyed Peas (BEPs).

    Why?? you ask
    Great question!


    I've never quite understood the meaning behind the BEP on NYD...
    Nor have I particularly enjoyed the BEPs... 
    they're nasty, smelly, little things, aren't they?
    (I knew you'd agree)

     This New Year's I decided to do a little history research behind the whole meaning and tradition of BEPs for NYD. After all, I am a grad student, and that's what we do - Research.

    According to some, Black Eyed Peas represent prosperity & luck in the coming new year. 
    Some might even argue that you should eat 365 peas to ensure a full years worth of  good luck and prosperity, while others might suggest saving one pea to share with a friend of loved one. Some even say that if you eat less than 365 peas you will have that many days of bad luck in the year, and if you eat more than 365 you'll have bad luck the entire year. I know, I know, it's really complicated. Just eat them (however many) and you'll be good. 

    Eating BEPs on NYD hasn't steered me wrong up to this point, so I'll continue to do it. Along with a couple of other things to ensure I get the very best out of my year.

    So back to the BEP... they're gross, they make your house smell, they're flavorless, and all around boring. Definitely not my go to bean, or pea, or legume. Whatever.

    This year, I decided to jazz things up a bit!!

    I decided to make the eating of BEP a little more FUN and a lot more tolerable, I mean, enjoyable.

    I introduce to you - Texas Caviar

    Never hear of it? Me either, until my extensive research efforts...

    Texas Caviar is a fun little side dish that can be served as a dip with chips, crackers, or bread...  It can be served as a cold Black-Eyed Pea Salad, if you will.  
    Or, if you're like me, it can be served with some cornbread so that you can tolerate eating 365 BEPs.

    So I turned to the wonderful, and always trustworthy Pioneer Woman, and found a lovely little recipe and added my own twist. 
    Cheese!! 
    It makes everything better, doesn't it?

    Plus, let's face it, we all want to ensure the very best for ourselves in the upcoming year, right?!
    So then we MUST EAT the Black-Eyed Peas. 


    Here's what you'll need


    Ingredients: Black-Eyed Peas (canned peas work perfectly fine too - and you won't have to cook them), Green Onion, Cilantro, Celery, Red Onion, Red Bell Pepper, Jalapeno (pretend the green pepper is a Jalapeno), Olive Oil, White Wine Vinegar, Ground Mustard, Celery Seed, Sugar, Salt, & Pepper. Not Pictured - Shredded Cheese


    So I found some pre-washed, pre-soaked Black Eyed Peas that I doctored up in the crock-pot to cook. I added some Salt Pork, Celery, and Onion and cooked them on high for about 4 hours and then let them cool over night. Refrigerate after they're cooled. 

    You'll need to begin this process by making the dressing. 

    Add some olive oil to a shallow bowl. 


    Then add the vinegar.


    Next, add sugar, ground mustard, celery seed, salt, and a good amount of ground black pepper.


    Give a good whisk!


    Do a little taste test to make sure it meets all your dressing need, then set it aside as you prepare the rest of the veggies.


    Chop up your celery.


    Dice up your red bell pepper.


    Chop up some green onions.


     Next, peel your cucumber and slice in half.


    Then remove the seeds.


    Now, chop up the red onion.


    Then, carefully, remove the seeds and dice up the jalapeno. Wash your hands well and avoid touching your face. I learned this the hard way.. Just use gloves. Trust me.


     Pour your Black-Eyed Peas in a large bowl.


    Then, throw all your pretty chopped up veggies into that large bowl with your black-eyed peas.


     Add about half a cup of shredded cheese, more if you're feeling a little frisky.


     Pour in that delicious dressing from earlier.


    Give the entire thing a good, but gentle mixing! 


    Isn't it colorful, and gorgeous?!


    Now, if you're truly Southern, add a nice big ole piece of Sweet Cornbread. Yum!


     Texas Caviar (adapted from The Pioneer Woman's Black-Eyed Pea Salsa)

    Ingredients
    For the Dressing
    • 1/2 cup Olive Oil
    • 1/3 cup White Wine Vinegar
    • 2 Tablespoons Sugar
    • 1 teaspoon Celery Seed
    • 1/2 teaspoon Ground Mustard
    • 1/2 teaspoon Salt
    • Freshly Ground Pepper, to taste

    For the Caviar
    VEGGIES:
    • 3 stalks Chopped Celery
    • 3 stalks Sliced Green Onions
    • 1 chopped Red Bell Pepper
    • 1/2 chopped Red Onion
    • 1 whole Cucumber, Peeled, Seeded, And Chopped
    • 1 whole Jalapeno (optional), Seeded And Chopped
    • 1/2 cup (or More If Desired) Chopped Cilantro
    • 24 oz cooked Black-eyed Peas (or 2 cans of drained Black-Eyed Peas)
    MISC:
    • 1/2 cup Shredded Cheese
    • Garlic Salt to taste

    Directions
    • Mix together dressing ingredients. Whisk well and set aside.
    • Combine all vegetables (except cilantro and shredded cheese) with black eyed peas.
    • Pour dressing over the top and gently stir together.
    • Add shredded cheese and cilantro and stir gently.
    • Cover and refrigerate for at least an hour.
    • Serve with warm cornbread.
    • Enjoy!

    This post is linked with love to the wonderful Weekend PotLuck , at The Country Cook.